

Cookies are important to achieve an easy browsing experience. They are small files that hold some data specific to a particular website, which are stored in the user’s computer.
Enabling cookies will benefit you with an easy browsing experience. Even you can set cookies for different websites as per your choice or block for some site as you want.
Enabling cookies can vary with web browsers.
In this tutorial, we are going to enable cookies in the Chrome browser.
To set cookies for the website in your browser you can follow these steps.
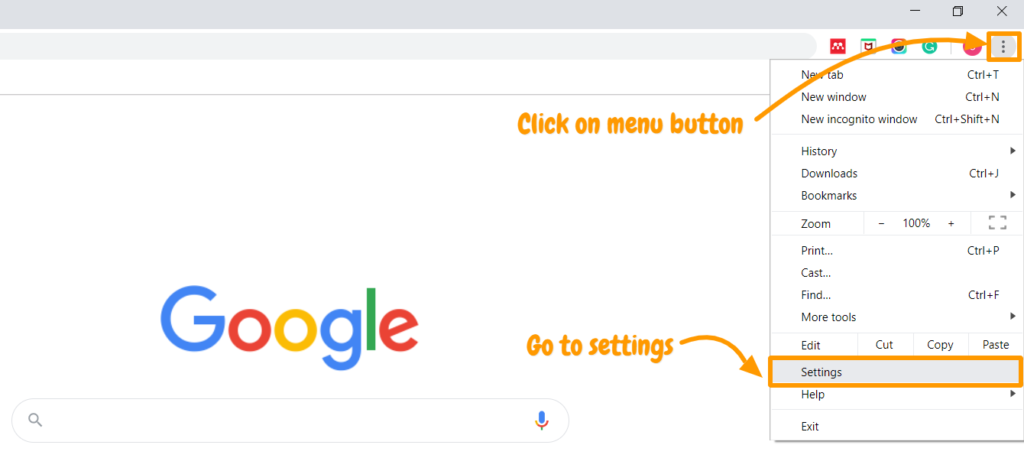
Step 1:
First, you need to open the Chrome browser. On the top right corner, you will see the menu icon. Click on the “Menu” icon. In the menu icon, select “Settings”.
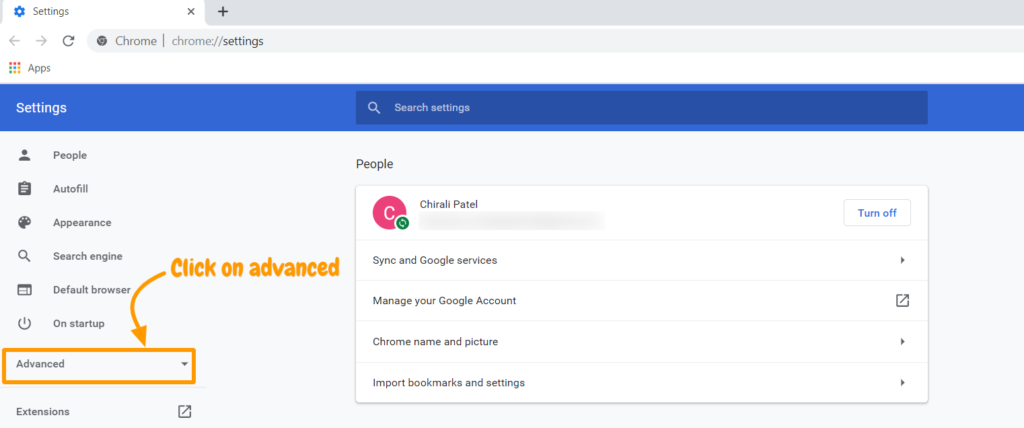
Step 2:
You will be directed to the “setting” panel. On the left side, the navigation panel is shown. Click on “Advanced” in that panel.
Step 3:
Advanced mode will provide you many options. Select the first option “ Privacy and Security”. It will show you privacy and security settings such as clear browsing data, sync and google services, site settings, etc.
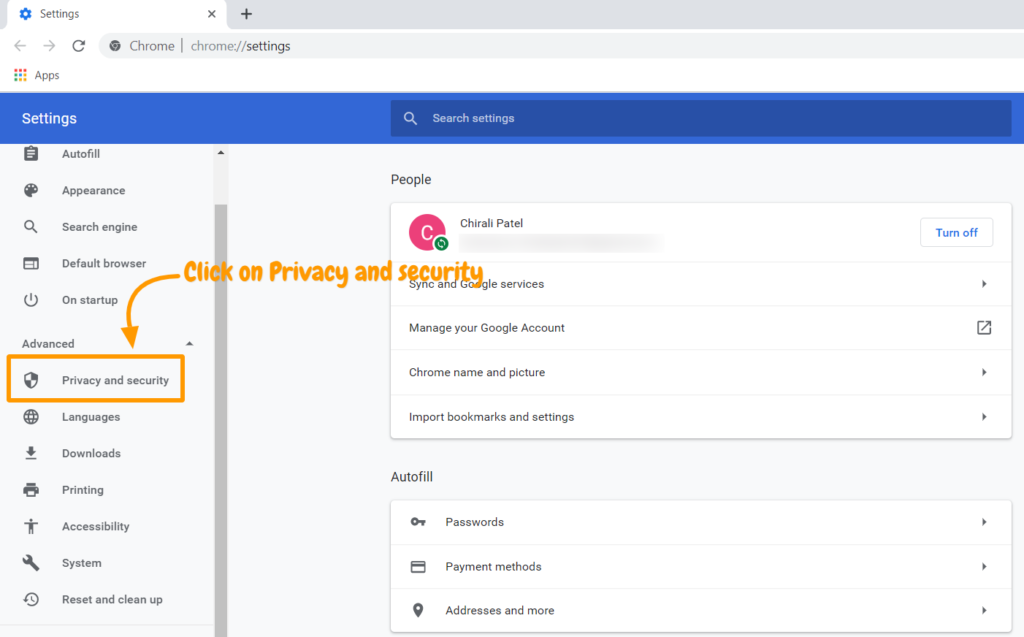
Now click on “ Site settings” which gives you the control of what information website can use and what content they can show you.
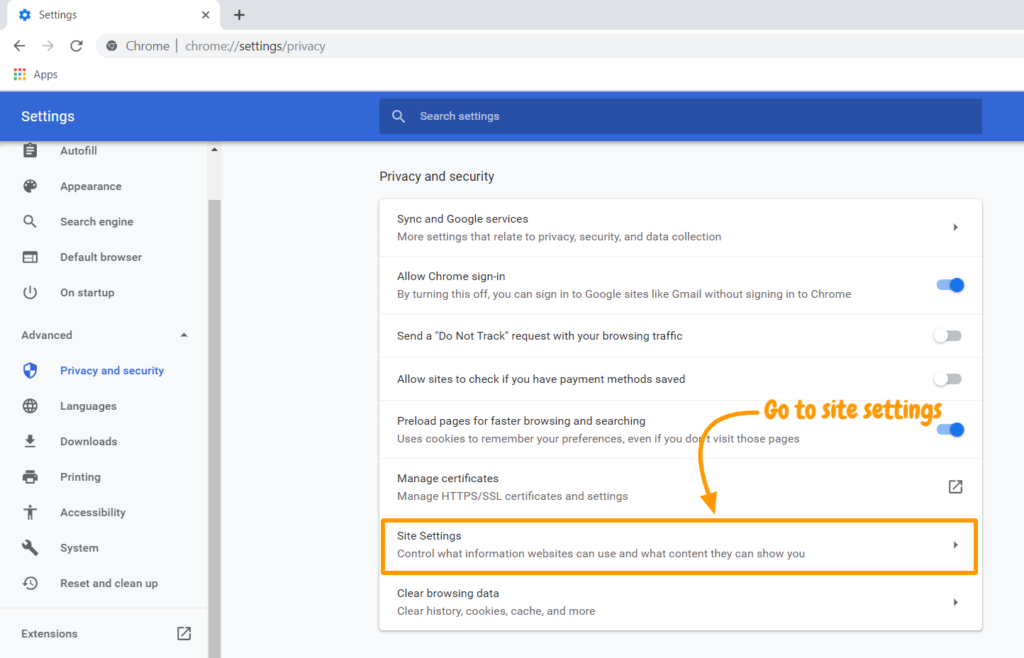
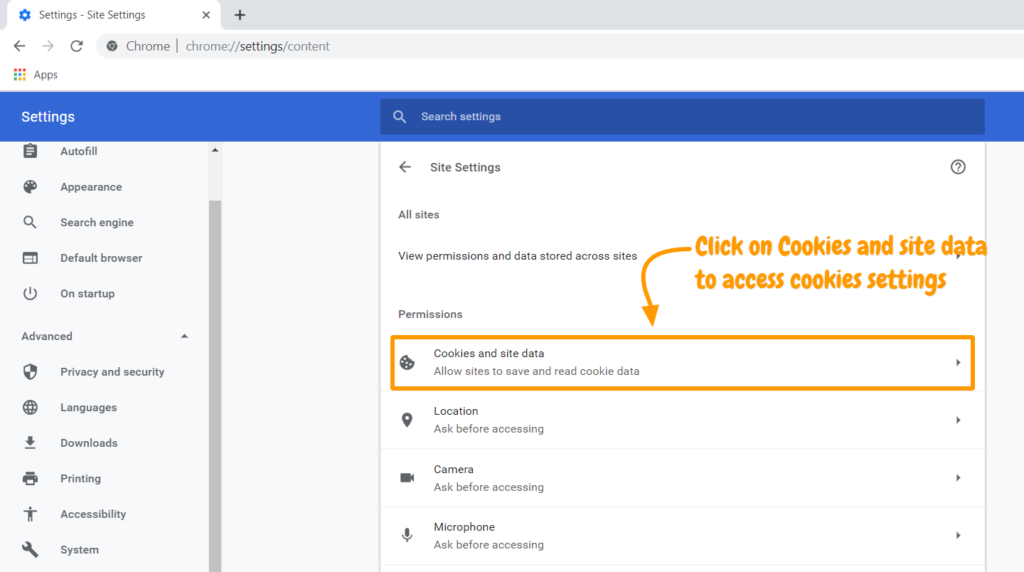
Step 4:
Site settings will lead you to permission settings and data stored across the sites. In the permission setting, select the first option “ Cookies and site data”.
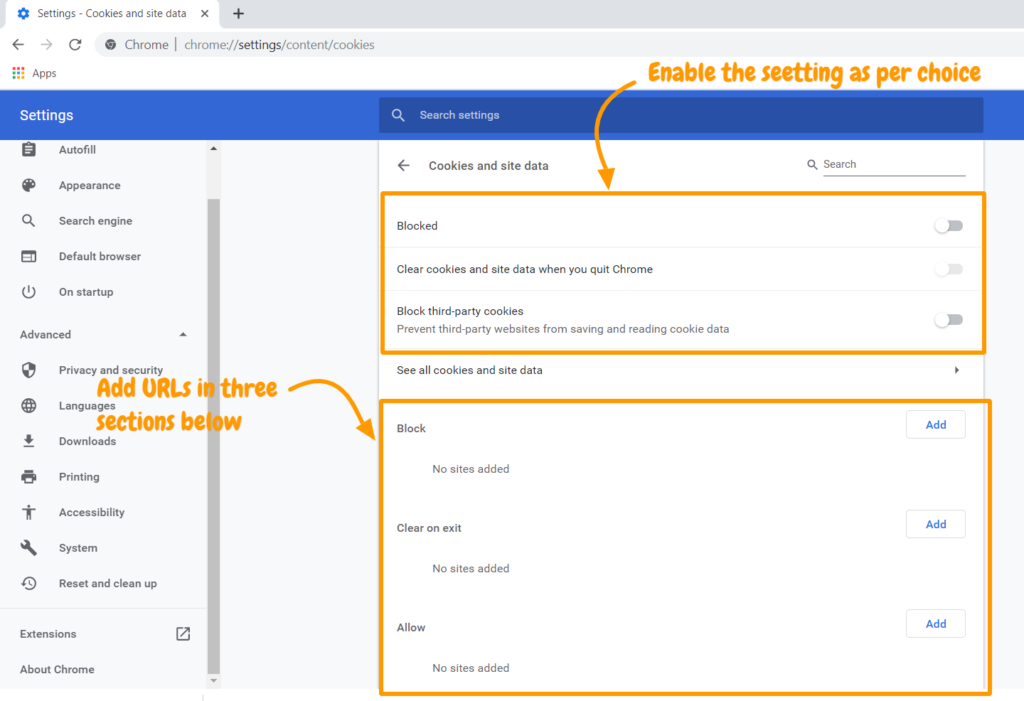
Step 5:
Under Cookies and site settings there will be two blocks, one with basic enable and disable options and another with advanced three sections – Block, Clear on exit and allow.
You can see blocked cookies, clear your browser cookies and block 3rd party cookies for all the websites.
There is the option for manually add site links and enable cookie settings for them individually.
This way you can allow which site can read the cookies data and enable the cookies setting as per your choice.
Let me know in the comments if you managed to do it.
Thank you for reading.
Photo by Jade Wulfraat on Unsplash
Leave a Reply