Hey everyone, no this is not a joke, you can literally make a blog in like 30 minutes top without any previous skills.
You don’t have to be a programmer, I will show you exactly how to do that in this blog post and after reading this article you will have your first blog online in like 10 minutes.
In my previous article, I talked about what is blog and what is the best possible way to start a wordpress blog.
While the only beginning was covered there, in this post I will go step by step and guide you in pushing your first page live on the web.
Steps For Setting Up a Blog:
Like any other work or a job, you have a certain number of rules to cover and certain number of steps to do in order to finish something, same is with the online work we’re about to do, so let’s start immediately.
1. Buy a domain name

First and most important step is this one, without domain name you cannot build your brand online or any kind of online presentation.
What is a domain name?
Domain name is the name of your website or a blog, and it represents an address where your visitors can find you online. Domain names were invented to make it easier for us humans to read particular addresses instead of the IP numbers.
Dns is responsible for mapping your domain name with IP and vice versa, but that’s also for another blog post.
Where to buy domain names?
I usually buy my domains at namecheap or godaddy. You need to realize that for a regular domain with .com TLD you will need to spend anywhere from $10 to $25 a year.

But if you’re just starting out, I would recommend NameCheap, it’s easier to use, pricing is better and you can always expect the discounts and they will not send any hidden charges.
I trust them because they are authoritative and I hold my domains with them for over 10 years now.

Godaddy is also great and affordable, but I really do hate their user interface, it’s all so buggy and confusing.
But on the other hand, godaddy has an amazing domain marketplace where I spent my days flipping domains and making money, I hope to cover that in my future posts.
2. Buy Web Hosting
Web hosting represents servers, space or a place where all of your website/blog files and folders are hosted and saved.
Web hosting connects with your domain over DNS nameservers and creates a working environment. Your domain is a representation of your brand name and hosting is your starting point from where browsers pull up information and data about your blog or a website and serve them to the end user.
I use over 10 hosting companies, it all depends from what type of projects I do.
Popular Types of Web Hosting
There are few types of web hosting packages you can choose from, I will mention some of the most familiar to me and the easiest ones to use.
Shared hosting – usually when starting out, shared hosting is good enough to use for small websites and blogs. It’s called shared because thousands of other websites are using the same server as you do.
VPS – or virtual private server, it’s a bit stronger than a shared one, it has a capabilities of a dedicated server but without paying as much as you would when using dedicated server. I use VPS when blogs are growing and when the traffic is eating my bandwith and storage space.
Dedicated server – now this is the best option you can choose from the mentioned list, dedicated server is your own server bought by you and configured by the web hosting company. These cost anywhere from $100/month to five figures a month.
I only use these when the project needs to grow and evolve to the next step of traffic and usage. It’s the most expensive one but if you ever come to this level I’m sure that money will not be the problem, but something else like scaling the website, data and etc…
Which hosting to choose?
Recommending a few is not an issue, some of you maybe worked with these, some probably not, but I must warn you…
From all the hosting companies I used, never I was fully satisfied with the service. And you need to be prepared on that, I still work with many, but every hosting company has it’s own pros. and cons.
When you come to the point where only 5 minutes of your site being offline is causing you hundreds of dollars of lost revenue, you will watch them differently like I do and you will be careful when choosing the next host for your blog.

Hostgator – you probably saw an ad somewhere or heard someone mentioning the blue gator and this interesting wordpress hosting company. When I was starting over 10 years ago I used hostgator, they changed a lot since then and the original owner sold the company and they merged I think with some larger brand/corporation.
But I still use them till this day, why?
They are cheap, reliable and they have the easiest panel for monitoring and controlling your website.
What I don’t like is the loading time of this portal panel, it drives me crazy sometimes. But for $12/ month you can host your starting business with them and they have a lot of useful tools for beginners to help you start blogging. I will show you later how you can install a blog with a push of a button from inside the gator panel.

Cloudways – this is my secret weapon, if you’re familiar with the server management and cloud hosting, then this hosting company is for you. Managed cloud hosting for WordPress with the ability to scale any server you like, from Google to Amazon. They use both nginx and apache, serving content and files separately.
I highly recommend them, someone is always online when it comes to contacting the support.
I had projects running on them successfully , both small and big projects. They never failed or went down. The only thing I didn’t liked about them is that they lack support content available on the site.
3. Connect Domain and Hosting
After you purchased the domain and set up your hosting account (paid for it and logged in) you will need to connect these two.
How?
- It’s really straightforward, when you buy a hosting, you will get DNS nameservers, they either get emailed to you or if you want you can buy your own nameservers.
- DNS nameservers are servers handling different operations on your website, like domain, emails etc.. and they are helping like I mentioned in converting readable name from webislove.com to machine readable IP address.
- All you need to do is connect these two (domain and hosting)
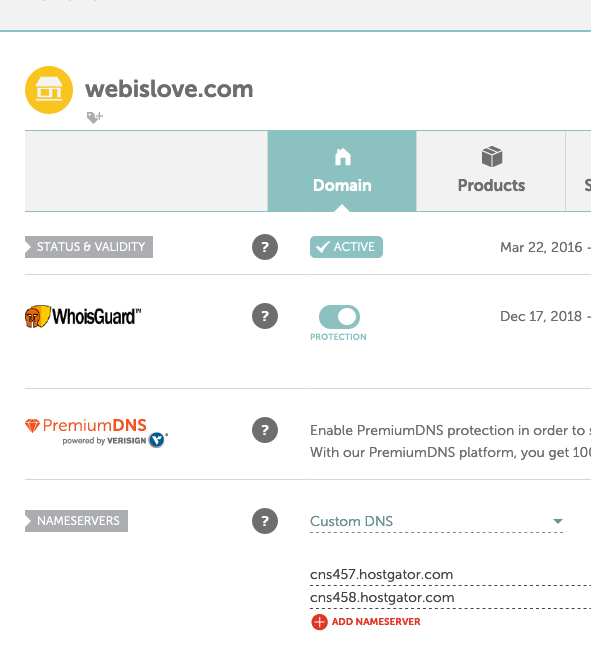
Once you find your nameservers the hosting provided you with, please log in to your domain provider, namecheap in my case, and add those nameservers in the DNS section.
Like you see from the photo below, my nameservers provided by the hostgator are added into the domain DNS section.
After this is done, you will need to wait 24 hours or less for propagation to take a place. You can create your website and do changes on it don’t worry, but you will have problems seeing them live until the propagation finishes.
Wait for Propagation
Propagation or the DNS propagation is the process where we need to wait until every server across the world updates new info about your domain and new hosting.
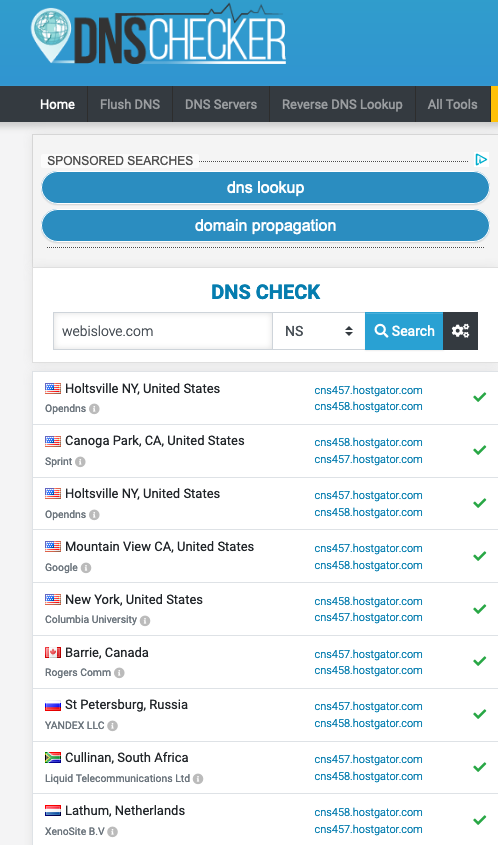
Here is a useful tool to check how the propagation is going: DNSchecker.org
How to know once the propagation is done, well first thing first you will see your NS appearing on every server worldwide and your website files will load and show on the front end.
Example:
4. Creating Database and User
Since almost every hosting company uses cpanel for their clients, same thing is with the hostgator. Cpanel is the admin panel from where you will control EVERYTHING related to your website.
Login details are usually sent to you via email by a hosting company,
But if you want to know how else can you log in to cpanel without having to remember all those ugly links:
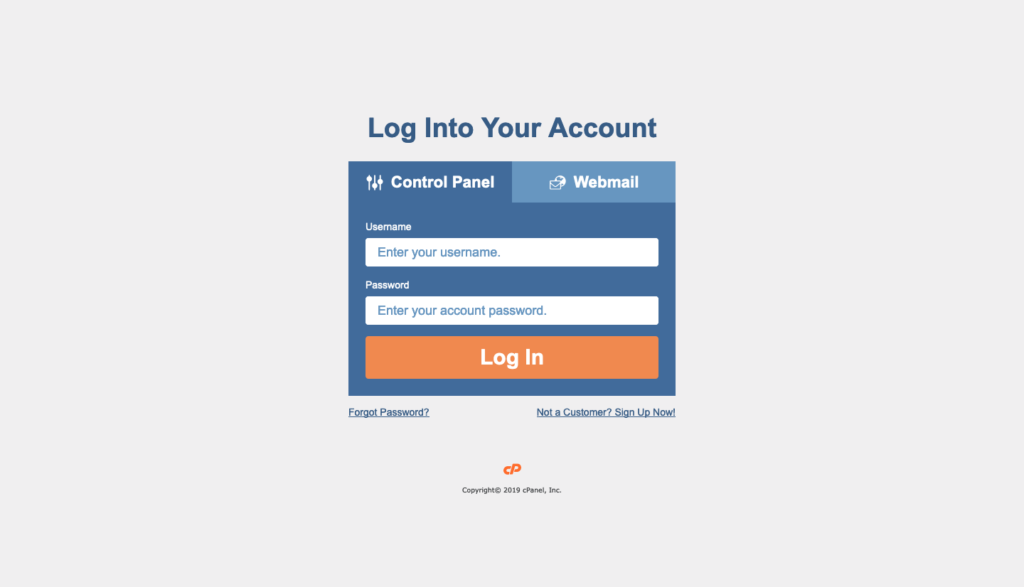
Type this in the URL bar in your browser: example.com/cpanel or example.com:2083
You should get something like this:
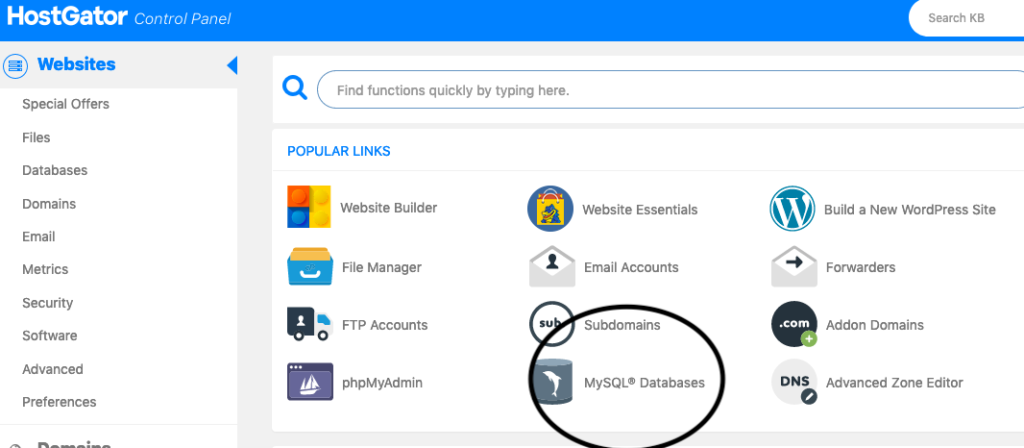
After you logged in, click MySQL Databases
Then go onto creating new database, give your DB a name and hit CREATE.
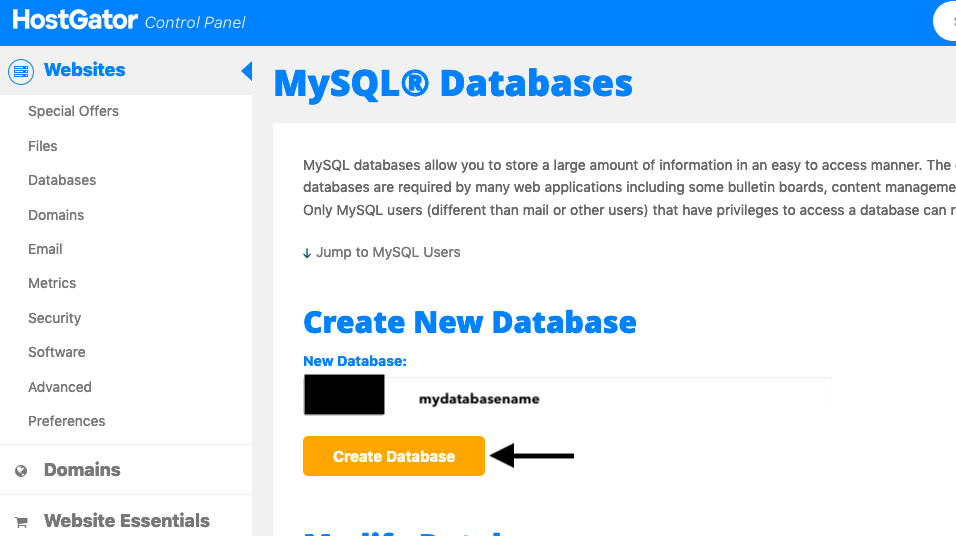
Next step will be to create a USER for that database:
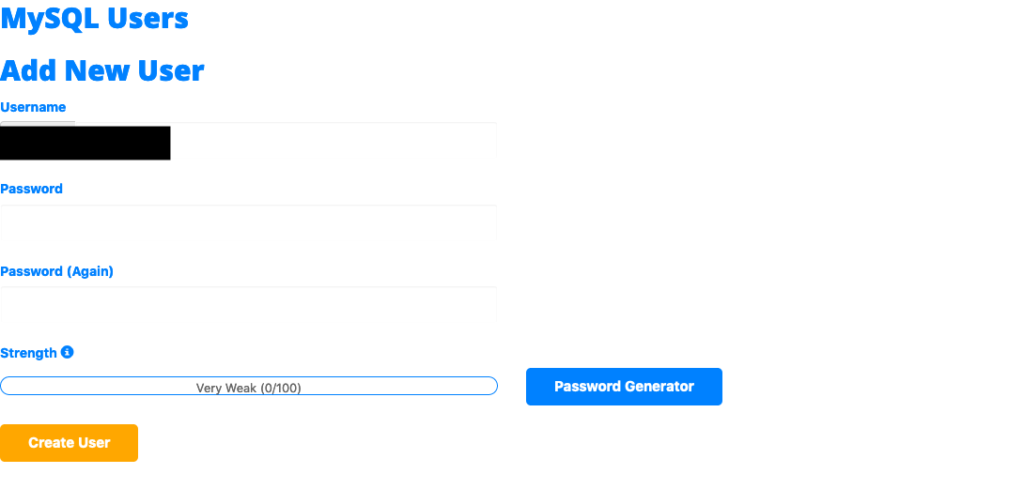
Now we need to connect that user with the new database, and to give him all the privileges in order for all of this to work. Choose the database from the dropdown and user too.

Mark all the privileges.
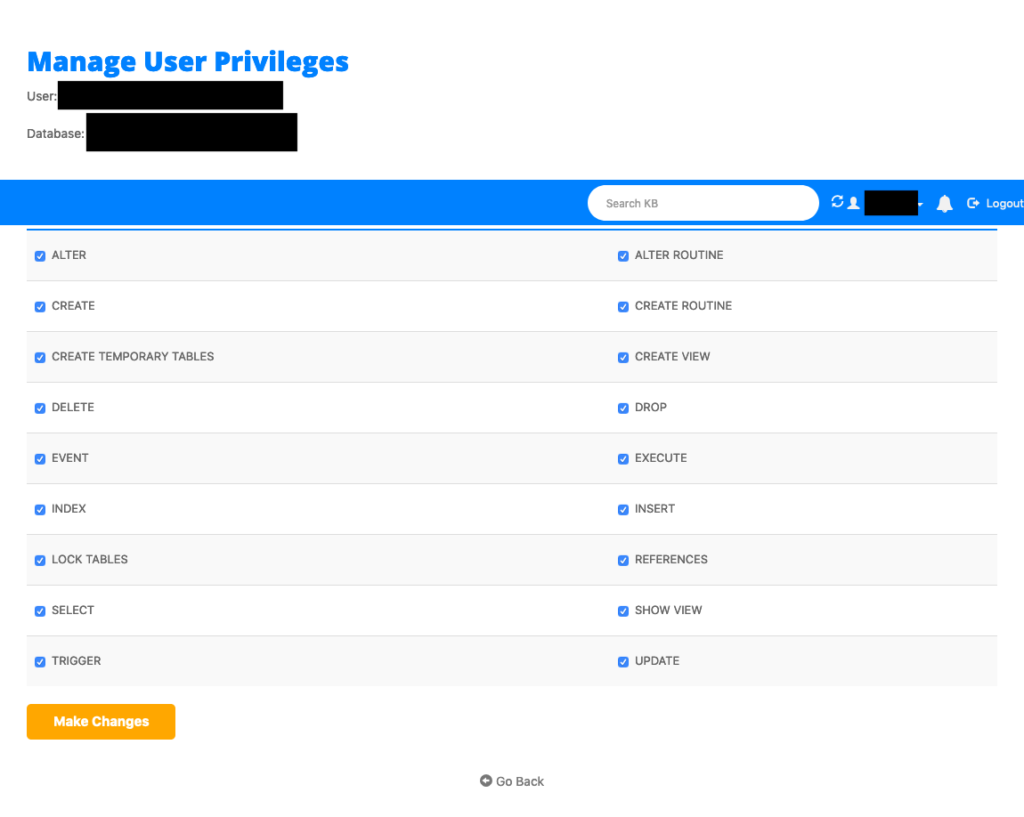
Once you did all that and saved changes, the hardest part is done, we have created new database where all of our website data will be stored and user to manage that database.
The next step in this tutorial is uploading WordPress and connecting it to this same database so our site can work flawlessly.
5. Uploading WordPress and Publishing Blog Live
Like i blogged in my previous article, WordPress is an open source CMS (content management system) than can help you create your robust and simple blogs and websites.
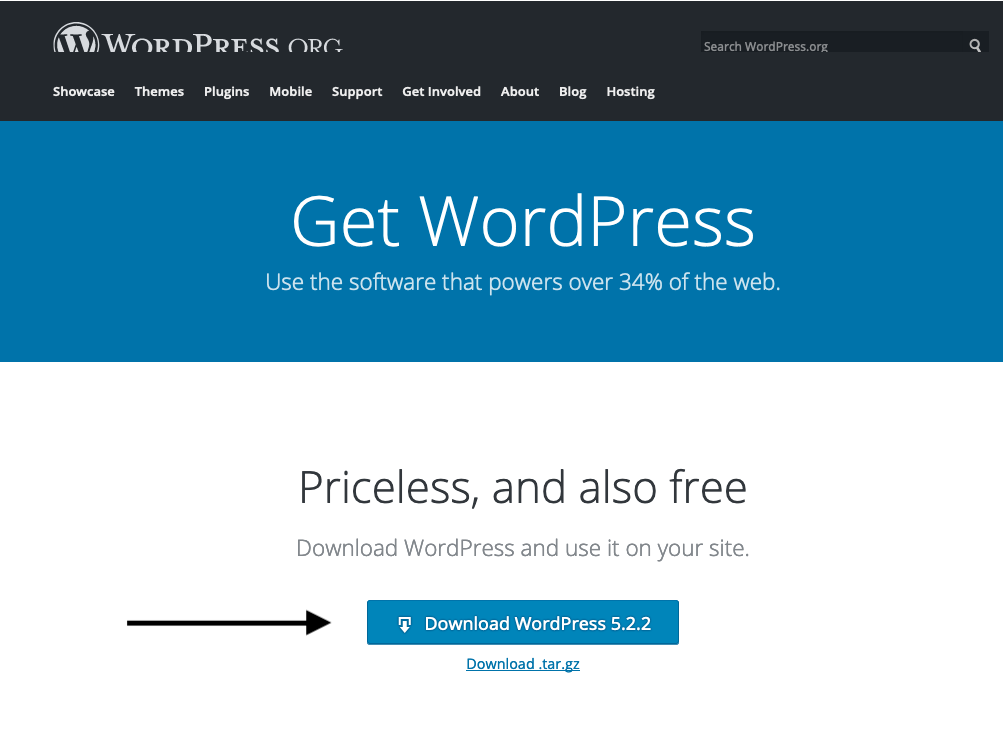
Let’s start with the download, please go to WordPress.org and download the latest version of WordPress.
Cpanel
Let’s get back to the cpanel and click on the file management:

Public_html directory
Once in the home directory of your website and file management panel, go to public_html, this directory is where from now on you will keep all of your website data, files, folders, images, sitemaps, htaccess and everything that keeps your site alive.
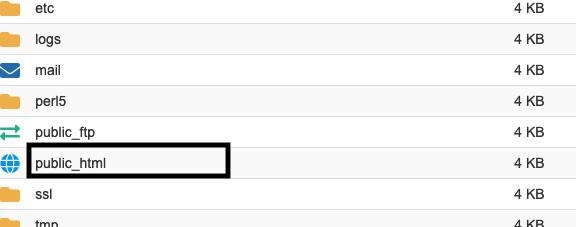
Now remember that WordPress installation file you downloaded? Good, upload it to public_html directory.

Once uploaded there, click once on the zip file, right click and extract the files inside the public_html directory.
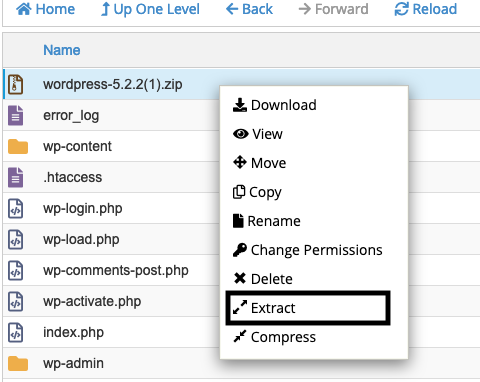
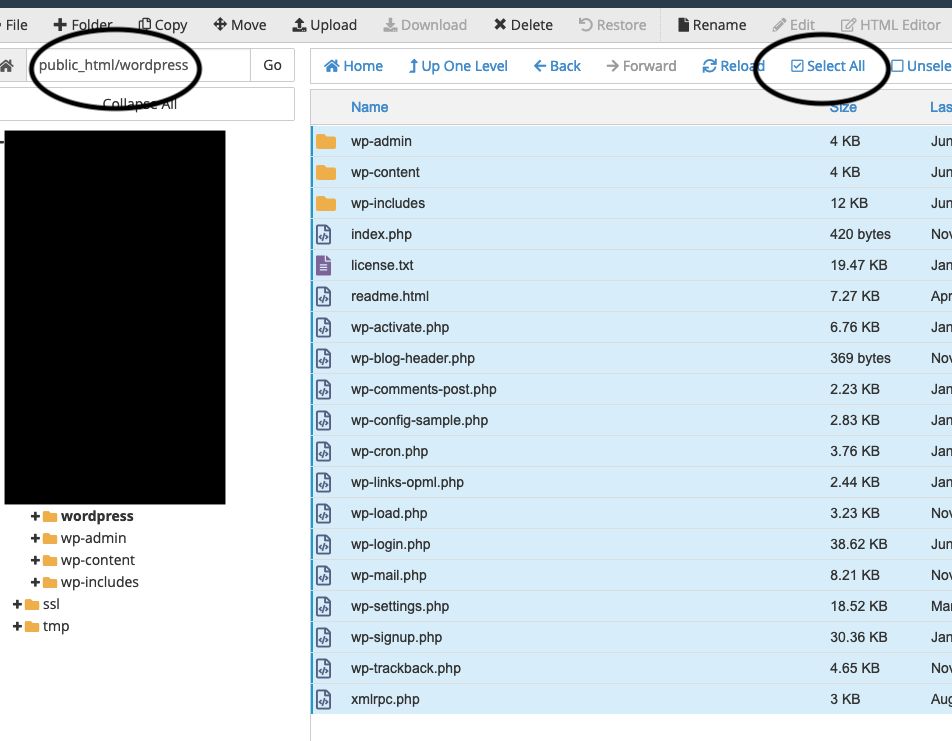
But there is a catch, since all those extracted files will be extracted as the folder called “wordpress” you will need to open that folder and move all files into the public_html again.
It’s simple, just follow the screenshots:

Mark all files in “wordpress” folder, set file path in the upper right corner to only “public_html” remove “wordpress”from the path and click MOVE.
Return to public_html and find a file called “wp-config-sample.php”, rename it to just wp-config.php.
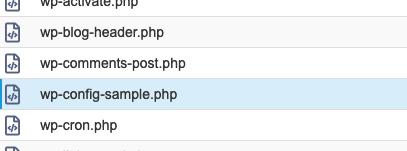
Open that file and add your database and username details you set up previously, including the password you set for the username.
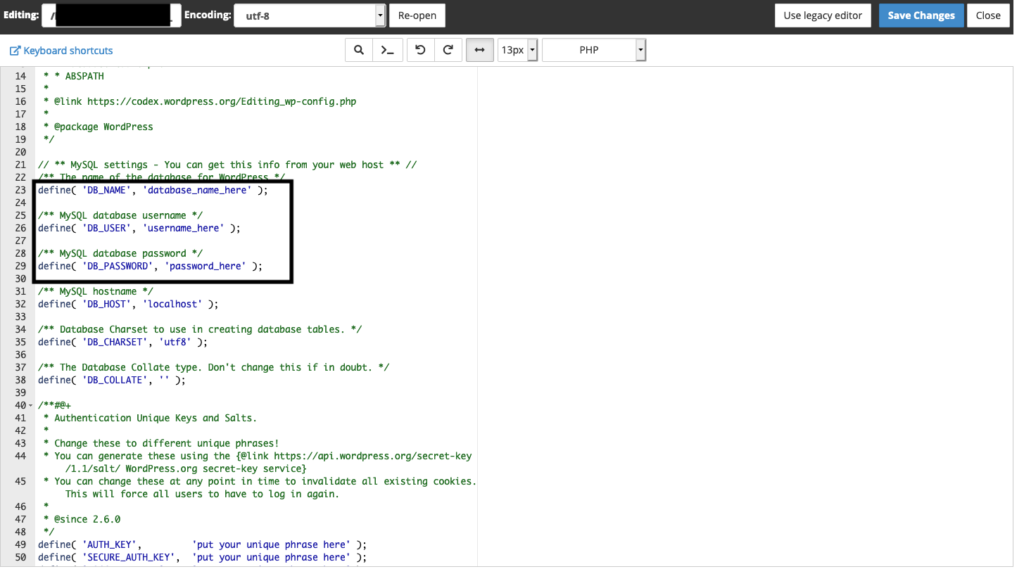
Click SAVE and now we are ready to go to our domain name to finish the installation of the wordpress.
Open up new tab in your browser and visit example.com. You will be redirected to http://example.com/wp-admin/install.php
Go ahead with the installation.
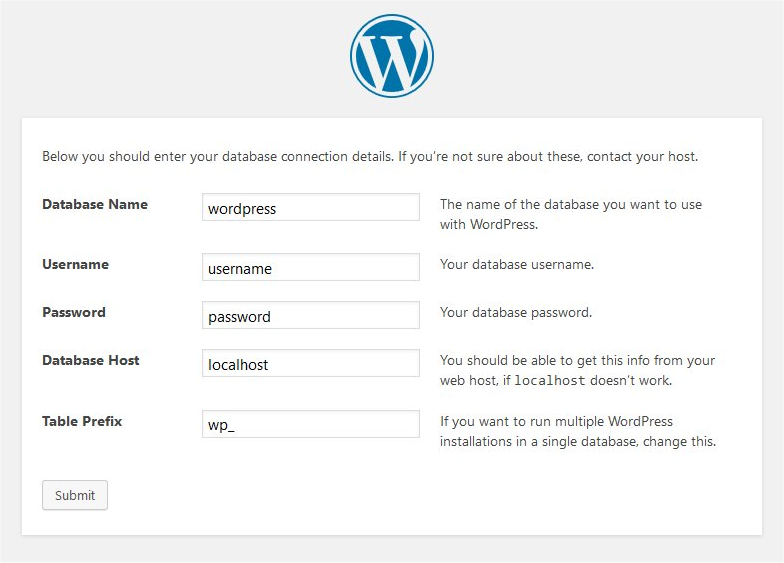
Finishing installation:
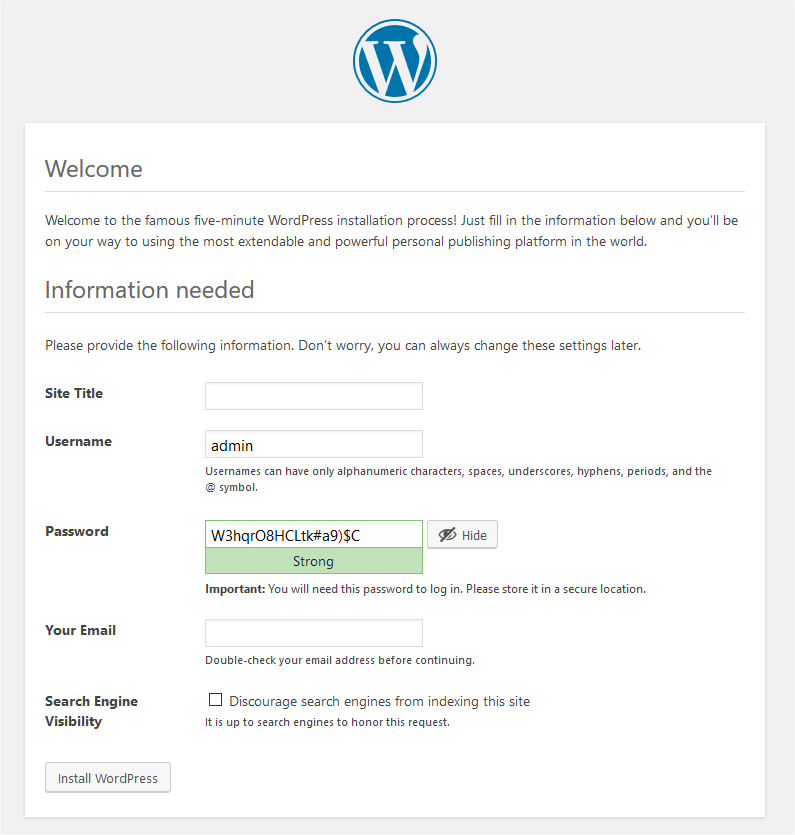
And that’s it, every time you want to log in to your website or blog powered by wordpress just visit this link: example.com/wp-admin or example.com/wp-login/
Your blog is now LIVE, visit example.com and see for yourself.
Hope this tutorial helped you a bit to realize that it’s not that hard to setup your first blog in like 30 minutes or less.
In the next article I will try to show you how to install themes, plugins and how to do SEO using the plugins and/or without one.
Thank you for reading.
Dalibor

Leave a Reply